It’s likely that you’ve heard of numerous ways that companies can reduce expenses by moving their information technology infrastructure and applications to the public cloud from a private or self-hosted data center, but achieving these savings requires strategic planning.
The main cost benefits from using the various services offered by public cloud providers such AWS, Azure, and Google Cloud stem from reducing (or completely eliminating) the capital expense (CapEx) and operating expenses (OpEx) associated with purchasing, leasing, and maintaining information technology assets such as servers, software, storage devices, and network routers.
Additionally, while it is obvious how companies can potentially save money by moving to the public cloud, it is not as clear as to how to maximize the return on the money spent from using the public cloud.
The following strategies can be used to increase your return on investment from using Microsoft Azure as your public cloud provider.
1. Establish S.M.A.R.T.-er Goals
What are you expecting to achieve from moving to Azure? Are you envisioning substantial savings in capital expenditure or the ability to scale critical business applications dynamically? Maybe you’re seeking to reduce your annual expenditures related to data storage.
Whatever the goals you’re hoping to realize, be certain they are specific, measurable, attainable, relevant, and timed. Additionally, ensure these goals are documented and communicated to your stakeholders.
These goals are critical for helping to make the decisions needed to drive the transition to Azure, get the buy-in from your stakeholders, and measure the success of your Azure implementation.
2. Find and Partner With the Right Cloud Service Provider (CSP)
With your goals clearly established, next, you will want to find the right CSP to assist with transitioning to Azure. The process of finding the right CSP involves several steps, but once you’ve selected an Azure-certified CSP, they can help guide your journey to Azure.
As a leading Azure-certified CSP, Centrilogic helps companies understand the cloud services available within Azure, refine goals for your Azure implementation, and can assist with building a custom roadmap for your journey to Azure.
3. Design the Solution
Often the step of designing a solution is completely skipped as a result of rushing to build a solution. However, foregoing the exercise of designing a solution introduces risk, and in turn, risk can lead to increased costs related to refactoring your solution.
Therefore, before beginning the process of building your solution in Azure, spend some time to build a conceptual design that describes the major features or components of the solution you want built.
Another major benefit of a design is that it will help facilitate discussions about what services are needed within your Azure implementation.
4. Build a Proof of Concept with Free Azure Credits or Reduced Azure Pricing
With a solution design in hand, you are now ready to start building a proof of concept for your Azure solution.
Why do I need a proof of concept?
A proof of concept is a low-risk and lower-cost approach for:
Validating (or invalidating) the solution design.
Evaluating some of the services available in Azure.
There are several options offered by Azure for building your proof of concept.
Free Azure credits: After creating an Azure account, if this is the first time you have signed up, you get a $200 credit that can be used within 30 days of setting up the account. Additionally, if your company has Visual Studio subscriptions, each subscription offers between $50 to $150 per month in Azure credits.
Reduced Azure Pricing: If you’ve already used the free Azure credits, your proof of concept is expected to use more than $200 of Azure, be in place longer than 30 days, or is expected to surpass your available Azure credits from Visual Studio, then it’s worthwhile to consider using Azure’s Dev/Test Labs, Pay-As-You-Go Dev/Test, and Enterprise Dev/Test subscriptions. Each of these options provides you with lower-cost options (compared to a regular Pay-As-You-Go, or Enterprise Agreement subscription) for building your proof of concept.
There are several Azure services that are free for the first 12 months of your Azure account and services that are always free. Check out the list of free services here.
5. Create an Azure Budget
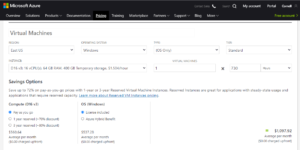
After creating a proof of concept for the Azure solution, it’s time to create a budget by building an estimate with the Azure Pricing Calculator. The Azure Pricing Calculator is a free online app that allows you to build and save estimates for Azure’s services and support options.
Generally, it is advantageous to build several estimates with the Azure Pricing Calculator. For example, it is useful to build an estimate that assumes all parts of your solution running 100% or predicts that some parts of the solution will only be running during business hours. These “what-if” estimates can then help you to build a budget for the services that you plan to use within Azure.
Keep in mind, Azure is a vast cloud platform and there are many different ways to optimize costs and performance. While we have identified the first 5 considerations, we have helped companies thrive in the Azure cloud beyond lift and shift and general configuration. If you’re looking to learn more, contact us.
Manage Cookie Consent
To provide the best experiences, we use technologies like cookies to store and/or access device information. Consenting to these technologies will allow us to process data such as browsing behavior or unique IDs on this site. Not consenting or withdrawing consent, may adversely affect certain features and functions.
Functional
Always active
The technical storage or access is strictly necessary for the legitimate purpose of enabling the use of a specific service explicitly requested by the subscriber or user, or for the sole purpose of carrying out the transmission of a communication over an electronic communications network.
Preferences
The technical storage or access is necessary for the legitimate purpose of storing preferences that are not requested by the subscriber or user.
Statistics
The technical storage or access that is used exclusively for statistical purposes.The technical storage or access that is used exclusively for anonymous statistical purposes. Without a subpoena, voluntary compliance on the part of your Internet Service Provider, or additional records from a third party, information stored or retrieved for this purpose alone cannot usually be used to identify you.
Marketing
The technical storage or access is required to create user profiles to send advertising, or to track the user on a website or across several websites for similar marketing purposes.